Payment Gateways
Configure payment gateways
Configuring payment gateways is an essential part of your business. Clients will not be able to send you money if you have not configured payment gateways properly.
Gateways are configured at Configuration --> Payment gateways section.
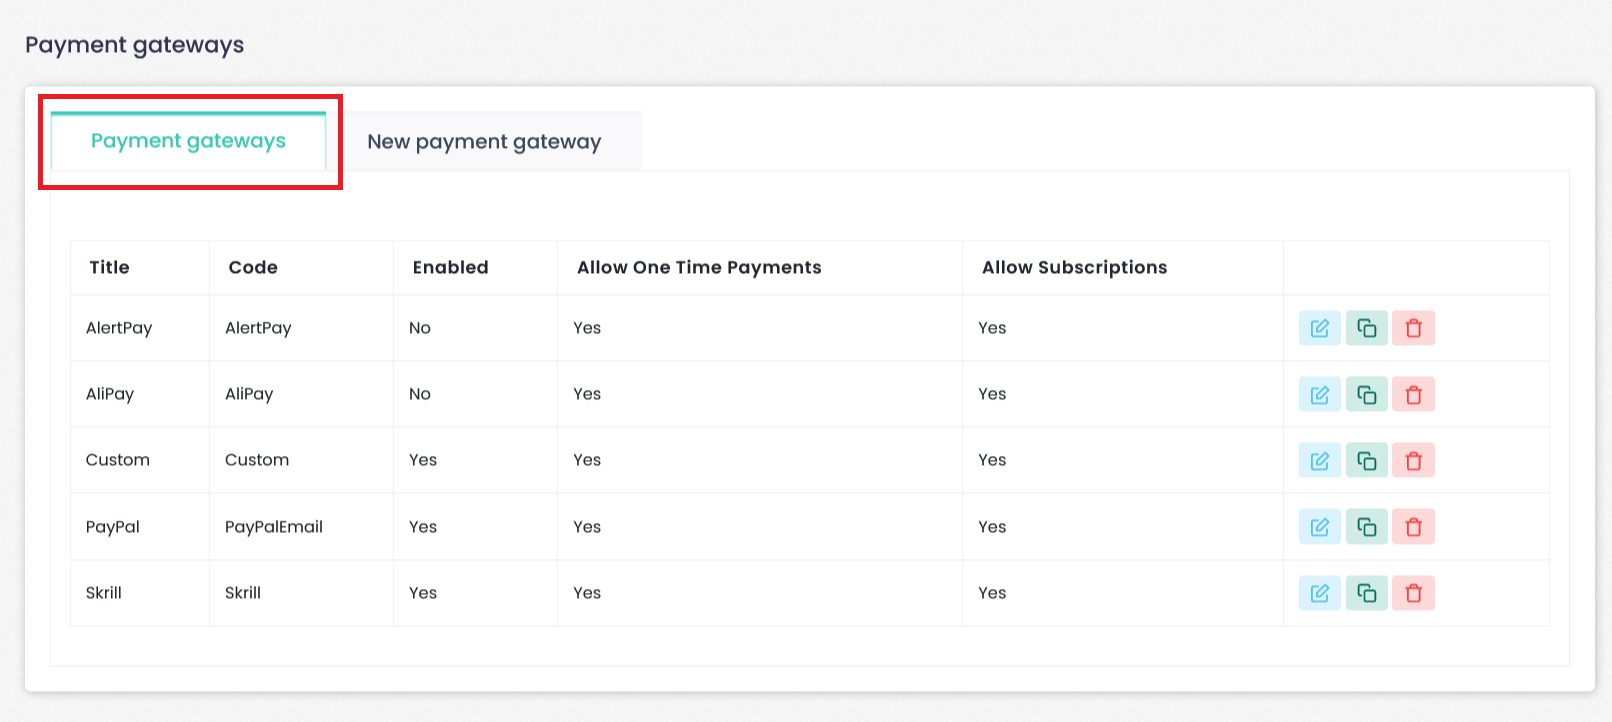
Enabled payment gateways are listed in the table. Click on payment gateway edit button and configuration window will appear. Each gateway has its own configuration parameters.
You can change the name of payment method instead of using default one. Some payment gateways do not accept all currencies, so you have to define, which currencies are acceptable. If invoice currency do not match assigned currency, gateway will not be offered as payment method.
Only enabled gateways will be offered for clients to pay for invoice.
WHB-Web Hosting Billing supports these payment gateways:
- Custom
- PayPal
- Authorize.net
- 2Checkout
- WebToPay
- AlertPay
- and more.
Note: All payment gateways are open source, so you can change or fix them for your needs. WHB-Web Hosting Billing is constantly integrating new payment gateways. Submit support ticket to request new payment gateway integration.
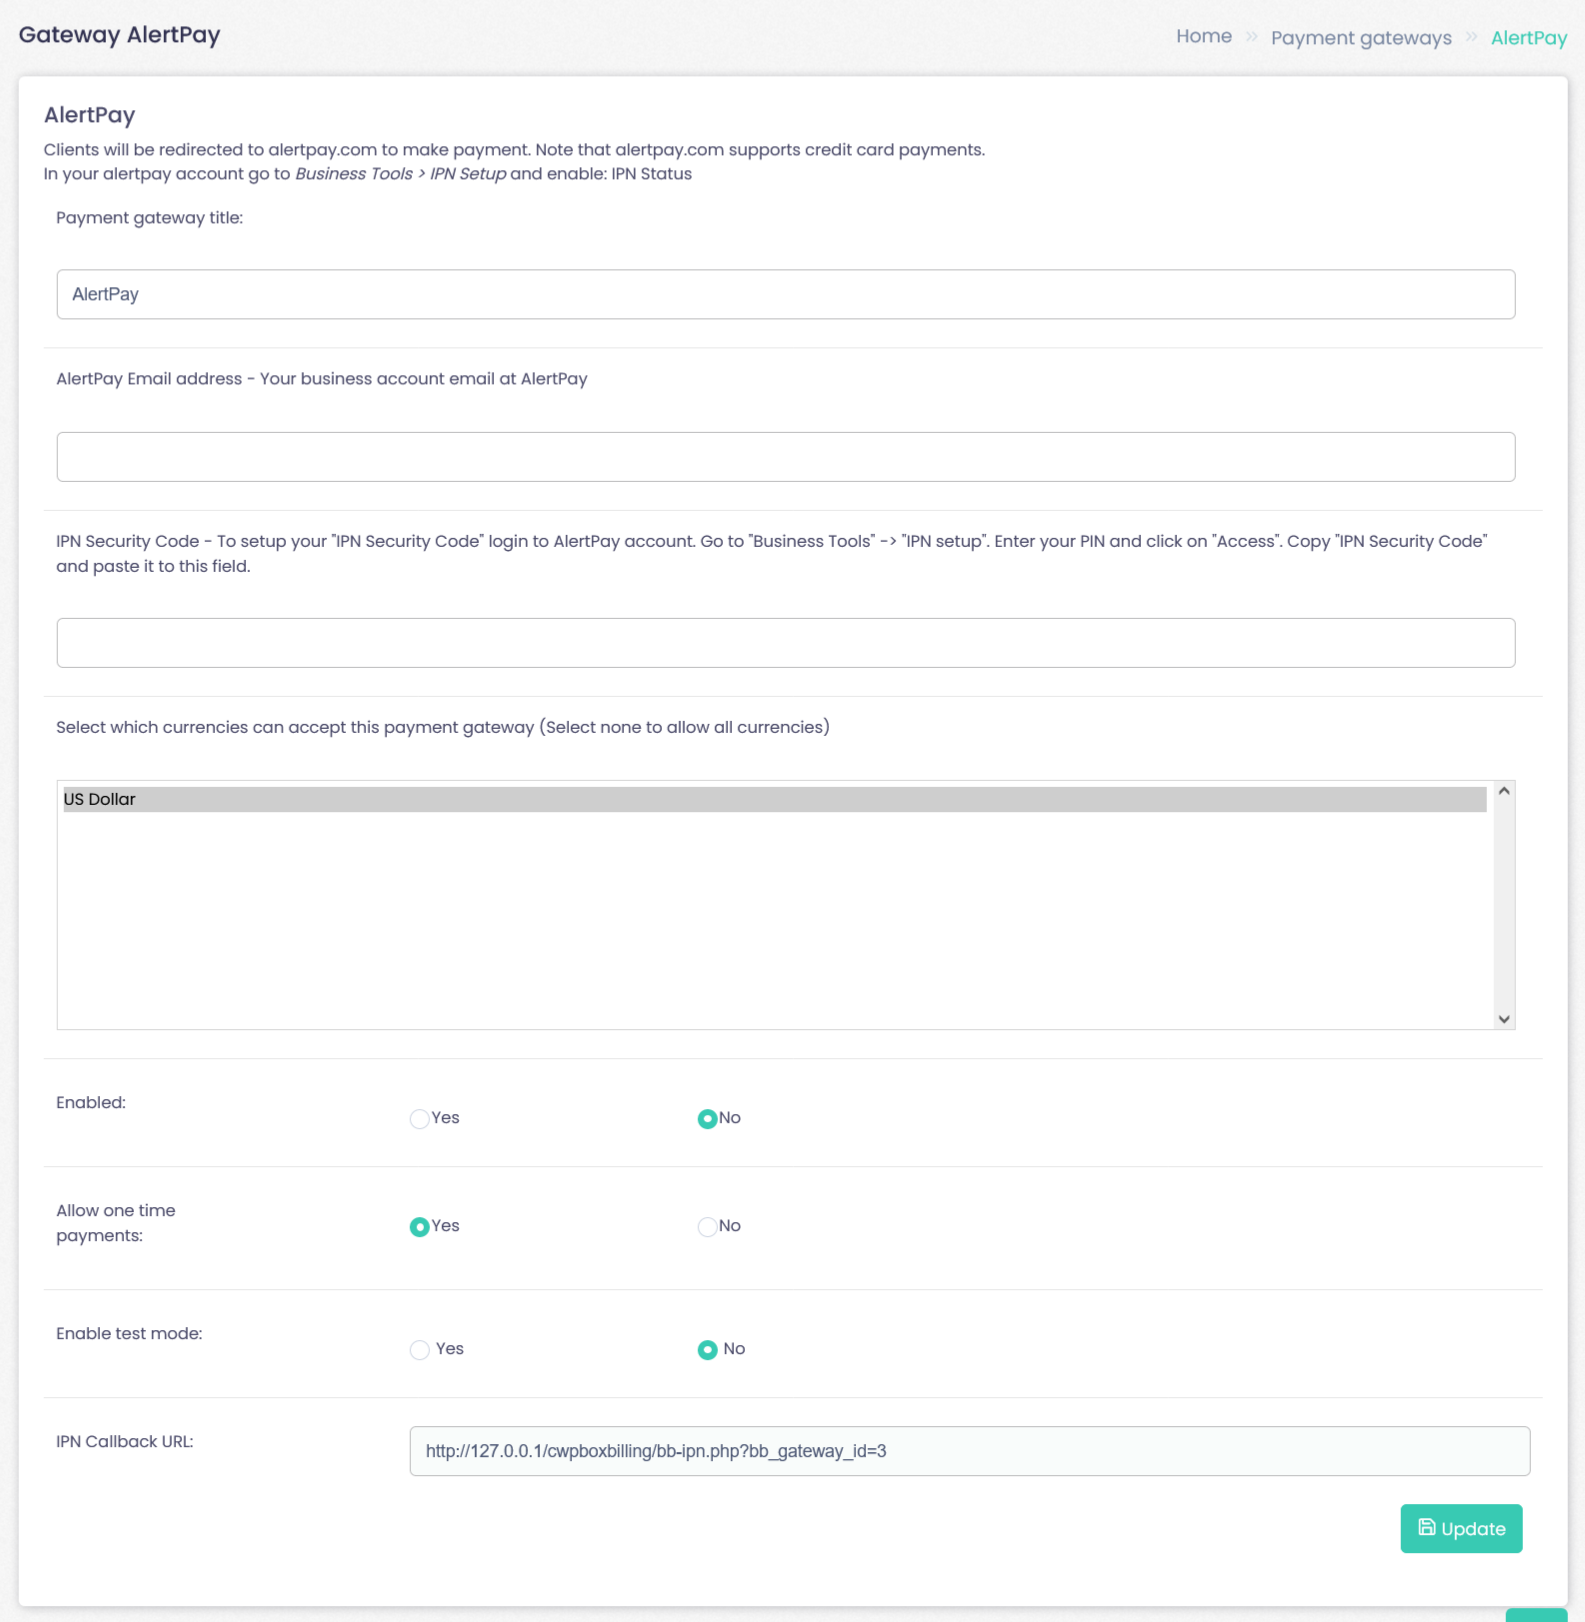
Gateway AlertPay
Clients will be redirected to alertpay.com to make payment. Note that alertpay.com supports credit card payments.
In your alertpay account go to Business Tools > IPN Setup and enable: IPN Status.
Add the following information:
- Payment gateway title
- AlertPay Email address – Your business account email at AlertPay
- IPN Security Code – To setup your “IPN Security Code” login to AlertPay account. Go to “Business Tools” -> “IPN setup”. Enter your PIN and click on “Access”. Copy “IPN Security Code” and paste it to this field.
- Select which currencies can accept this payment gateway (Select none to allow all currencies)
- Enabled: Yes/No
- Allow one time payments: Yes/No
- Enable test mode:Yes/No
- IPN Callback URL: https://cwp-billing.studio4host.com/bb-ipn.php?bb_gateway_id=3
New Payment Gateway
Configuration –> Payment gateways section–> New Payment Gateway
Adding new payment gateway
Although WebHostingBilling ships with most popular payment gateways, you can install other gateways.
Follow these instructions to install new payment gateway:
- Check for payment gateway at WebHosting Billing extensions site for more payment gateways
- Downlaod payment gateway extension file and place it to: C:\xamppNew\htdocs\cwpboxbilling/bb-library/Payment/Adapter
- After file is uploaded in place, reload this page
- Select uploaded file name and click on install
- Payment gateway will be installed in WebHosting Billing and can be configured in “Payment Gateways” tab
- For developers. Read WebHosting Billing documentation to learn how to create your own payment gateway and share it with community
Configuring Custom Payment gateway
Custom payment gateway is a way to provide your clients custom information on how they can send you money.
This is useful if none of the provided payment gateways suits your needs.
In order to setup custom payment gateways, please select “Custom” from the list, and a new Pop-up window will be displayed.
You will need to paste full HTML code in the pop up window. You can use {{ invoice. }}* tags inside this html code. This code will be displayed when client chooses to pay for invoice with Custom payment gateway.
Note: Test mode is used for administrators to test if gateway is functioning as it is expected without need to spend real money. Not all payment gateways supports this feature.
